


ECS is the AWS Docker container service that handles the orchestration and provisioning of Docker containers. This is a beginner level introduction to AWS ECS. I’ve seen some nightmare posts and some glowing reviews about the ECS service, so I knew it was going to interesting to get my hands dirty and see what ECS was all about.
Summary of the ECS Terms
I covered ECS Terms in this post: What AWS ECS Terms Mean Tutorial. Here’s the diagram from that post again to refresh your memory.
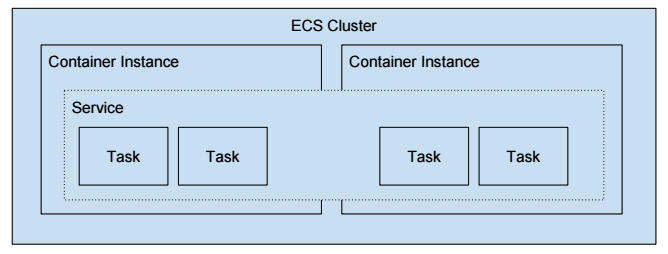
In this diagram, you can see that there are 4 running Tasks or Docker containers. They are part of an ECS Service. The Service and Tasks span 2 Container Instances. The Container Instances are part of a logical group called an ECS Cluster.
I did not show a Task Definition in the diagram because a Task is simply an “instance” of Task Definition.
Tutorial Example
In this tutorial example, I will create a small Sinatra web service that prints the meaning of life: 42.
- Create ECS Cluster with 1 Container Instance
- Create a Task Definition
- Create an ELB and Target Group to later associate with the ECS Service
- Create a Service that runs the Task Definition
- Confirm Everything is Working
- Scale Up the Service to 4 Tasks.
- Clean It All Up
The ECS First Run Wizard provided in the Getting Started with Amazon ECS documentation performs the similar above with a CloudFormation template and ECS API calls. I’m doing it out step by step because I believe it better helped me understand the ECS components.
1. Create ECS Cluster with 1 Container Instance
Before creating a cluster, let’s create a security group called my-ecs-sg that we’ll use.
aws ec2 create-security-group --group-name my-ecs-sg --description my-ecs-sg
Now create an ECS Cluster called my-cluster and the ec2 instance that belongs to the ECS Cluster. Use the my-ecs-sg security group that was created. You can get the id of the security group from the EC2 Console / Network & Security / Security Groups. It is important to select a Key pair so you can ssh into the instance later to verify things are working.
For the Networking VPC settings, I used the default VPC and all the Subnets associated with the account to keep this tutorial simple. For the IAM Role use ecsInstanceRole. If ecsInstanceRole does not yet exist, create it per AWS docs. All the settings are provided in the screenshot. You will need to change the settings according to your account and default VPC and Subnets values.

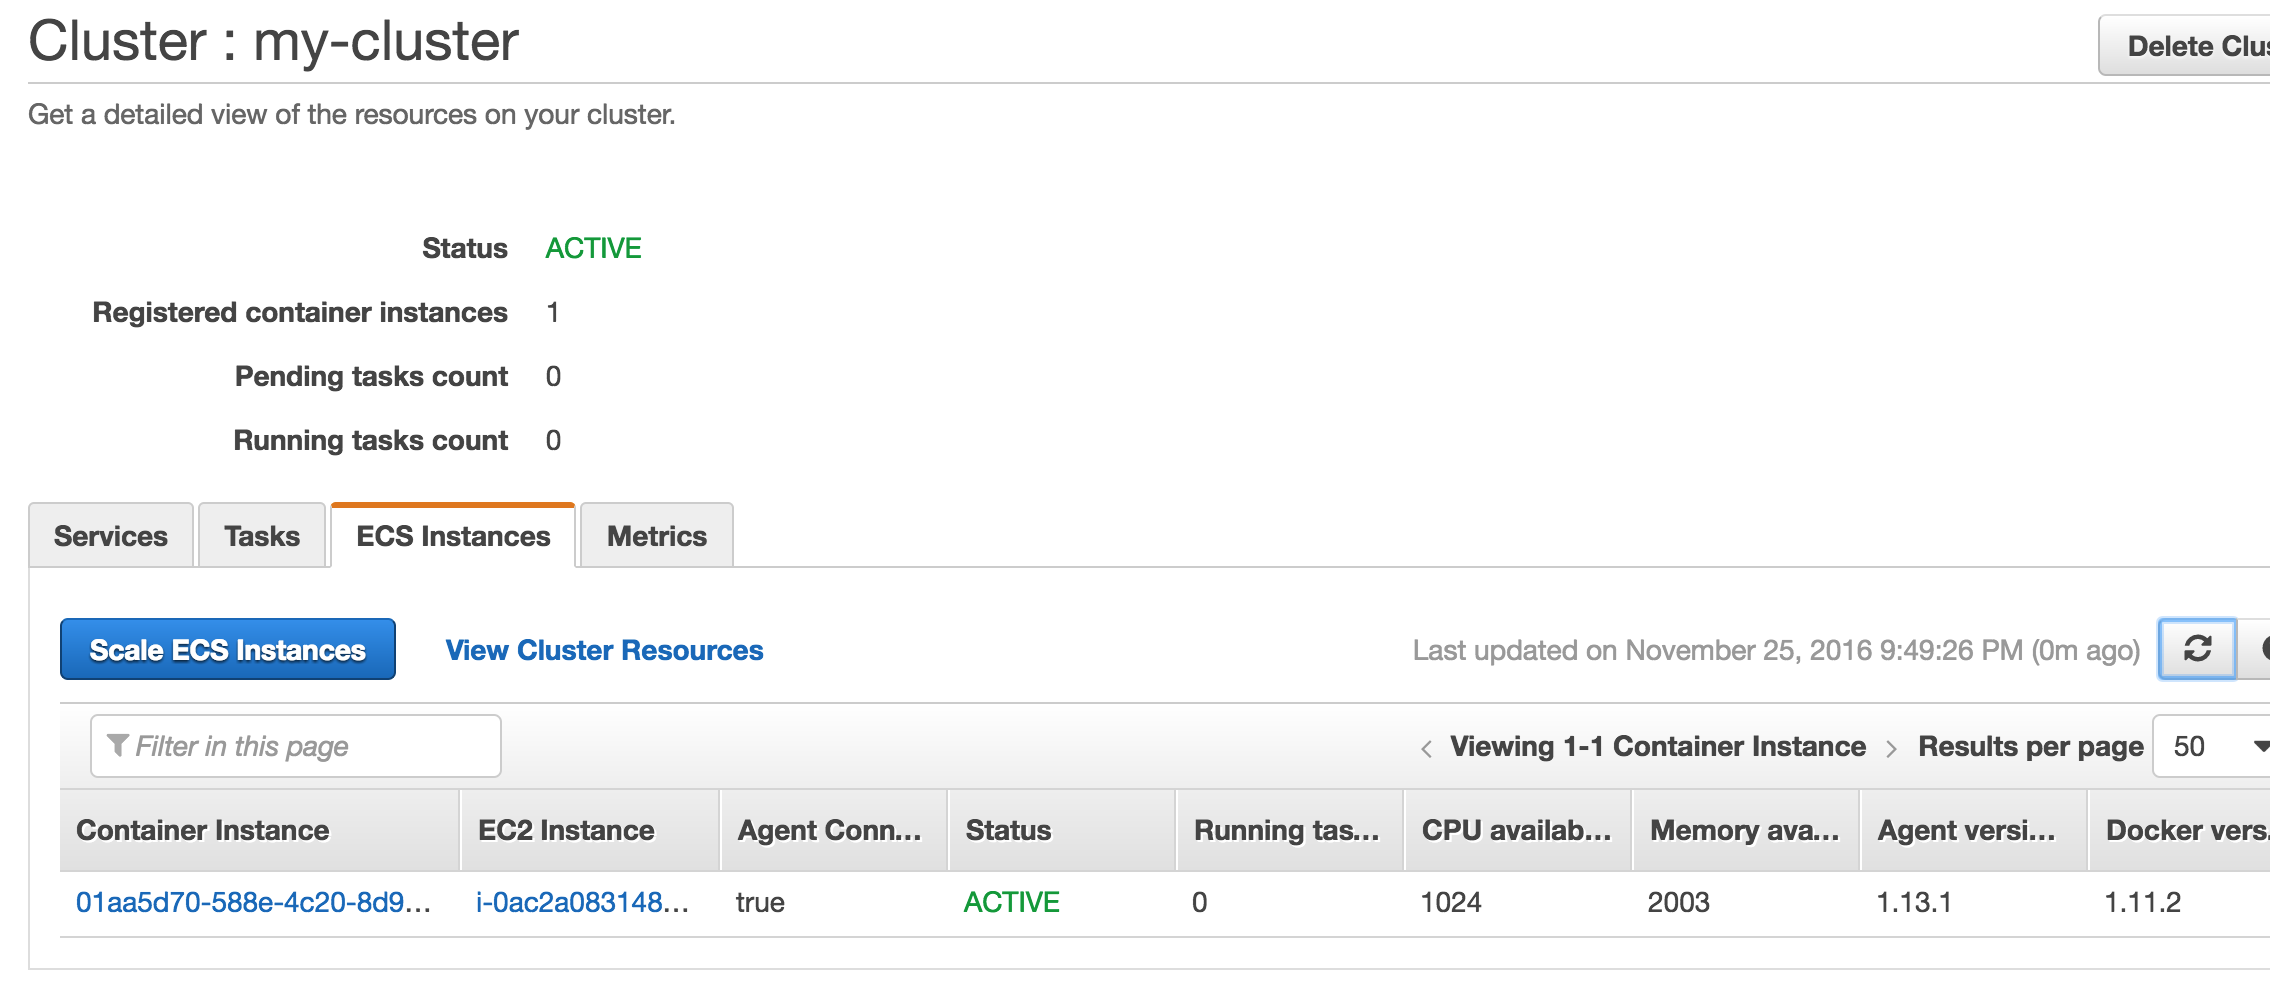
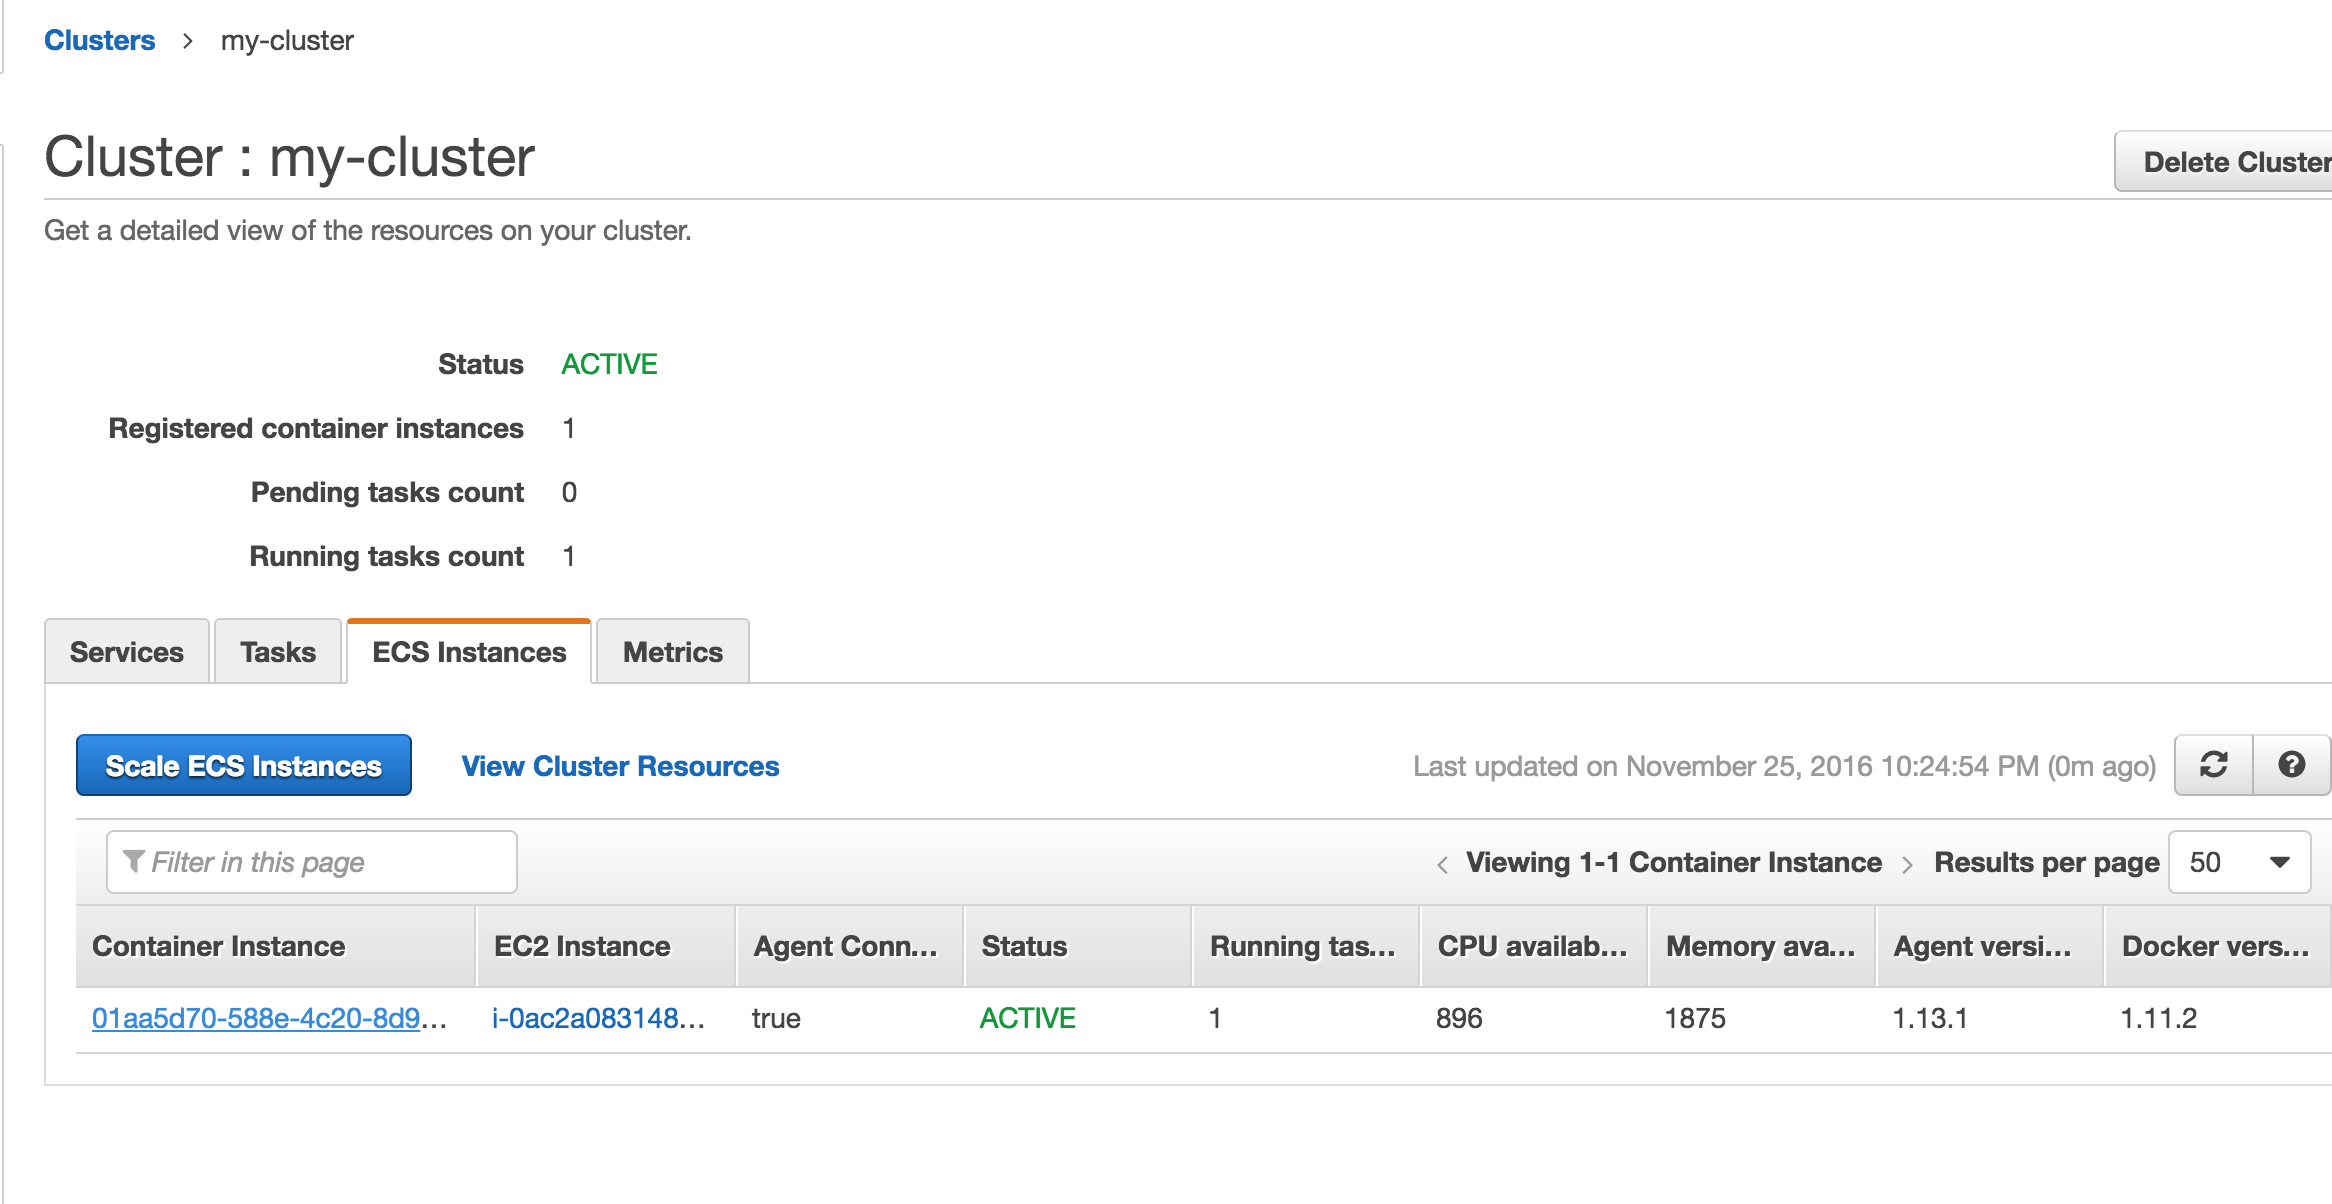
Wait a few minutes and the confirm that the Container Instance has successfully registered to the my-cluster ECS cluster. You can confirm it by clicking on the ECS Instances tab under Clusters / my-cluster.
2. Create a task definition that will be blueprint to start a Sinatra app
Before creating the task definition, find a sinatra docker image to use and test that it’s working. I’m using the tongueroo/sinatra image.
$ docker run -d -p 4567:4567 --name hi tongueroo/sinatra
6df556e1df02e93b05aa46425fc539121f5e50afee630e1cd918b337c3b6c202
$ docker ps
CONTAINER ID        IMAGE                COMMAND             CREATED             STATUS              PORTS                    NAMES
6df556e1df02        tongueroo/sinatra   "ruby hi.rb"        2 seconds ago       Up 1 seconds        0.0.0.0:4567->4567/tcp   hi
$ curl localhost:4567 ; echo
42
$ docker stop hi ; docker rm hi
$
Above, I’ve started a container with the sinatra image and ran curl localhost:4657. Port 4567 is the default port that sinatra listens on, and it is exposed in the Dockerfile. It returns “42” as expected. Now that I’ve tested the sinatra image and verify that it works let’s create the task definition. Create a task-definition.json and add:
{
  "family": "sinatra-hi",
  "containerDefinitions": [
    {
      "name": "web",
      "image": "tongueroo/sinatra:latest",
      "cpu": 128,
      "memoryReservation": 128,
      "portMappings": [
        {
          "containerPort": 4567,
          "protocol": "tcp"
        }
      ],
      "command": [
        "ruby", "hi.rb"
      ],
      "essential": true
    }
  ]
}
The task definition is also available on GitHub: task-definition.json. To register the task definition:
$ aws ecs register-task-definition --cli-input-json file://task-definition.json
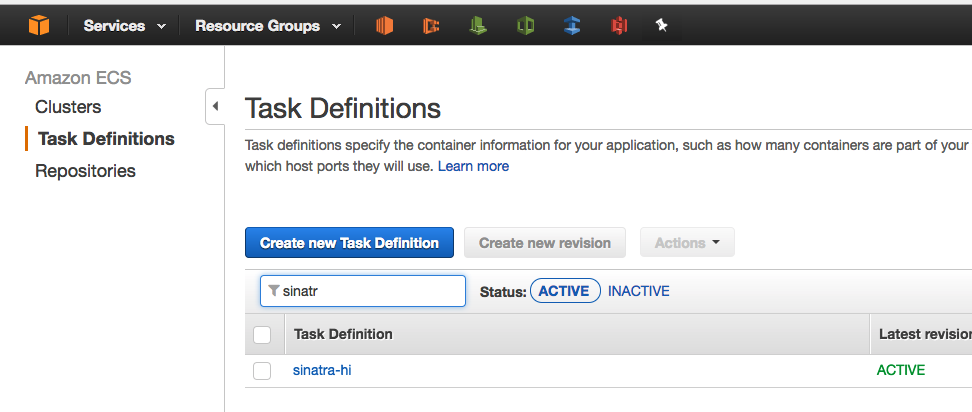
Confirm that the task definition successfully registered with the ECS Console:
3. Create an ELB and Target Group to later associate with the ECS Service
Now let’s create an ELB and a target group with it. We are creating an ELB because we eventually want to load balance requests across multiple containers and also want to expose the sinatra app to the internet for testing. The easiest way to create an ELB is with the EC2 Console.
Go the EC2 Console / Load Balancing / Load Balancers, click “Create Load Balancer” and select Application Load Balancer.
Wizard Step 1 — Configure Load Balancer
-
Name it my-elb and select internet-facing.
-
Use the default Listener with an HTTP protocol and Port 80.
-
Under Availability Zone, chose a VPC and chose the subnets you would like. I selected all 4 subnets in the default VPC just like step 1. It is essential to choose the same subnets that were chosen when you created the cluster in step 1. If the subnets are not the same, the ELB health check can fail, and the containers will keep getting destroyed and recreated in an infinite loop if the instance is launched in an AZ that the ELB is not configured to see.
Wizard Step 2 — Configure Security Settings
- There will be a warning about using a secure listener, but for this exercise we can skip using SSL.
Wizard Step 3 — Configure Security Groups
- Create a new security group named
my-elb-sgand open up port 80 and source 0.0.0.0/0 so anything from the outside world can access the ELB port 80.
Wizard Step 4 — Configure Routing
- Create a new target group name
my-target-groupwith port 80.
Wizard Step 5 — Register Targets
- This step is a little odd for ECS. We do not register any targets here because ECS will automatically register the targets for us when new tasks are launched. So simply skip and click next.
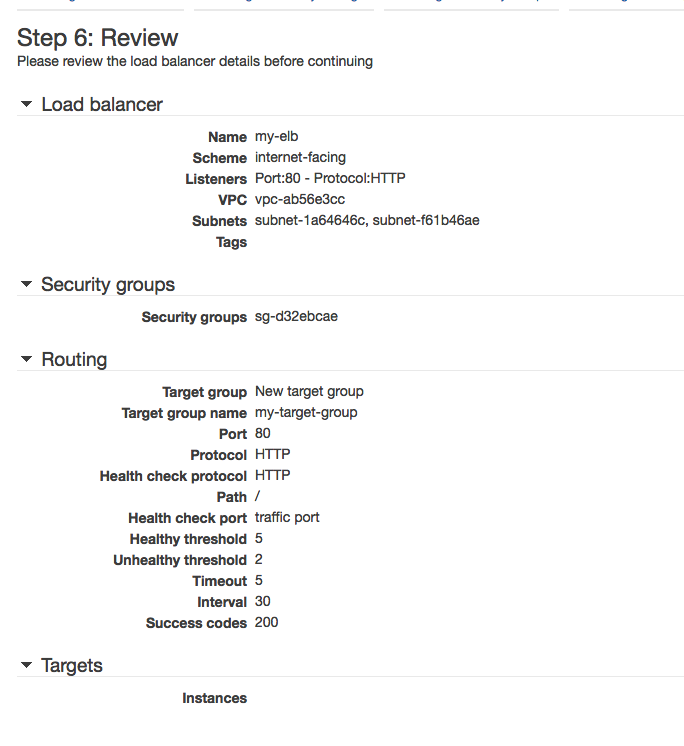
Wizard Step 6 — Review
- Review and click create.
When we created the ELB with the wizard we opened, it’s my-elb-sg group port 80 to the world. We also need to make sure that the my-ecs-sg security group associated with the instance we launched in step 1 allows traffic from the ELB. We created the my-ecs-sg group in step 1 at the very beginning of this tutorial. To allow all ELB traffic to hit the container instance run the following:
$ aws ec2 authorize-security-group-ingress --group-name my-ecs-sg --protocol tcp --port 1-65535 --source-group my-elb-sg
Confirm the rules were added to the security groups via the EC2 Console:

With these security group rules, only port 80 on the ELB is exposed to the outside world and any traffic from the ELB going to a container instance with the my-ecs-group group is allowed. This a nice simple setup.
4. Create a Service that runs the Task Definition
Before creating a service, we should ensure that the ecsServiceRole IAM role exists. If you this is your first time using ECS, it might not have been created yet. The instructions on how to create it is on ecsServiceRole AWS Docs. After you’ve verified that the ecsServiceRole exists continue along.
The command to create the ECS service takes a few parameters so it is easier to use a JSON file as it’s input. Let’s create an ecs-service.json file with the following:
{
    "cluster": "my-cluster",
    "serviceName": "my-service",
    "taskDefinition": "sinatra-hi",
    "loadBalancers": [
        {
            "targetGroupArn": "FILL-IN-YOUR-TARGET-GROUP",
            "containerName": "web",
            "containerPort": 4567
        }
    ],
    "desiredCount": 1,
    "role": "ecsServiceRole"
}
You will have to find your targetGroupArn created in step 3 when we created the ELB. To find the targetGroupArn you can go to the EC2 Console / Load Balancing / Target Groups and click on the my-target-group.
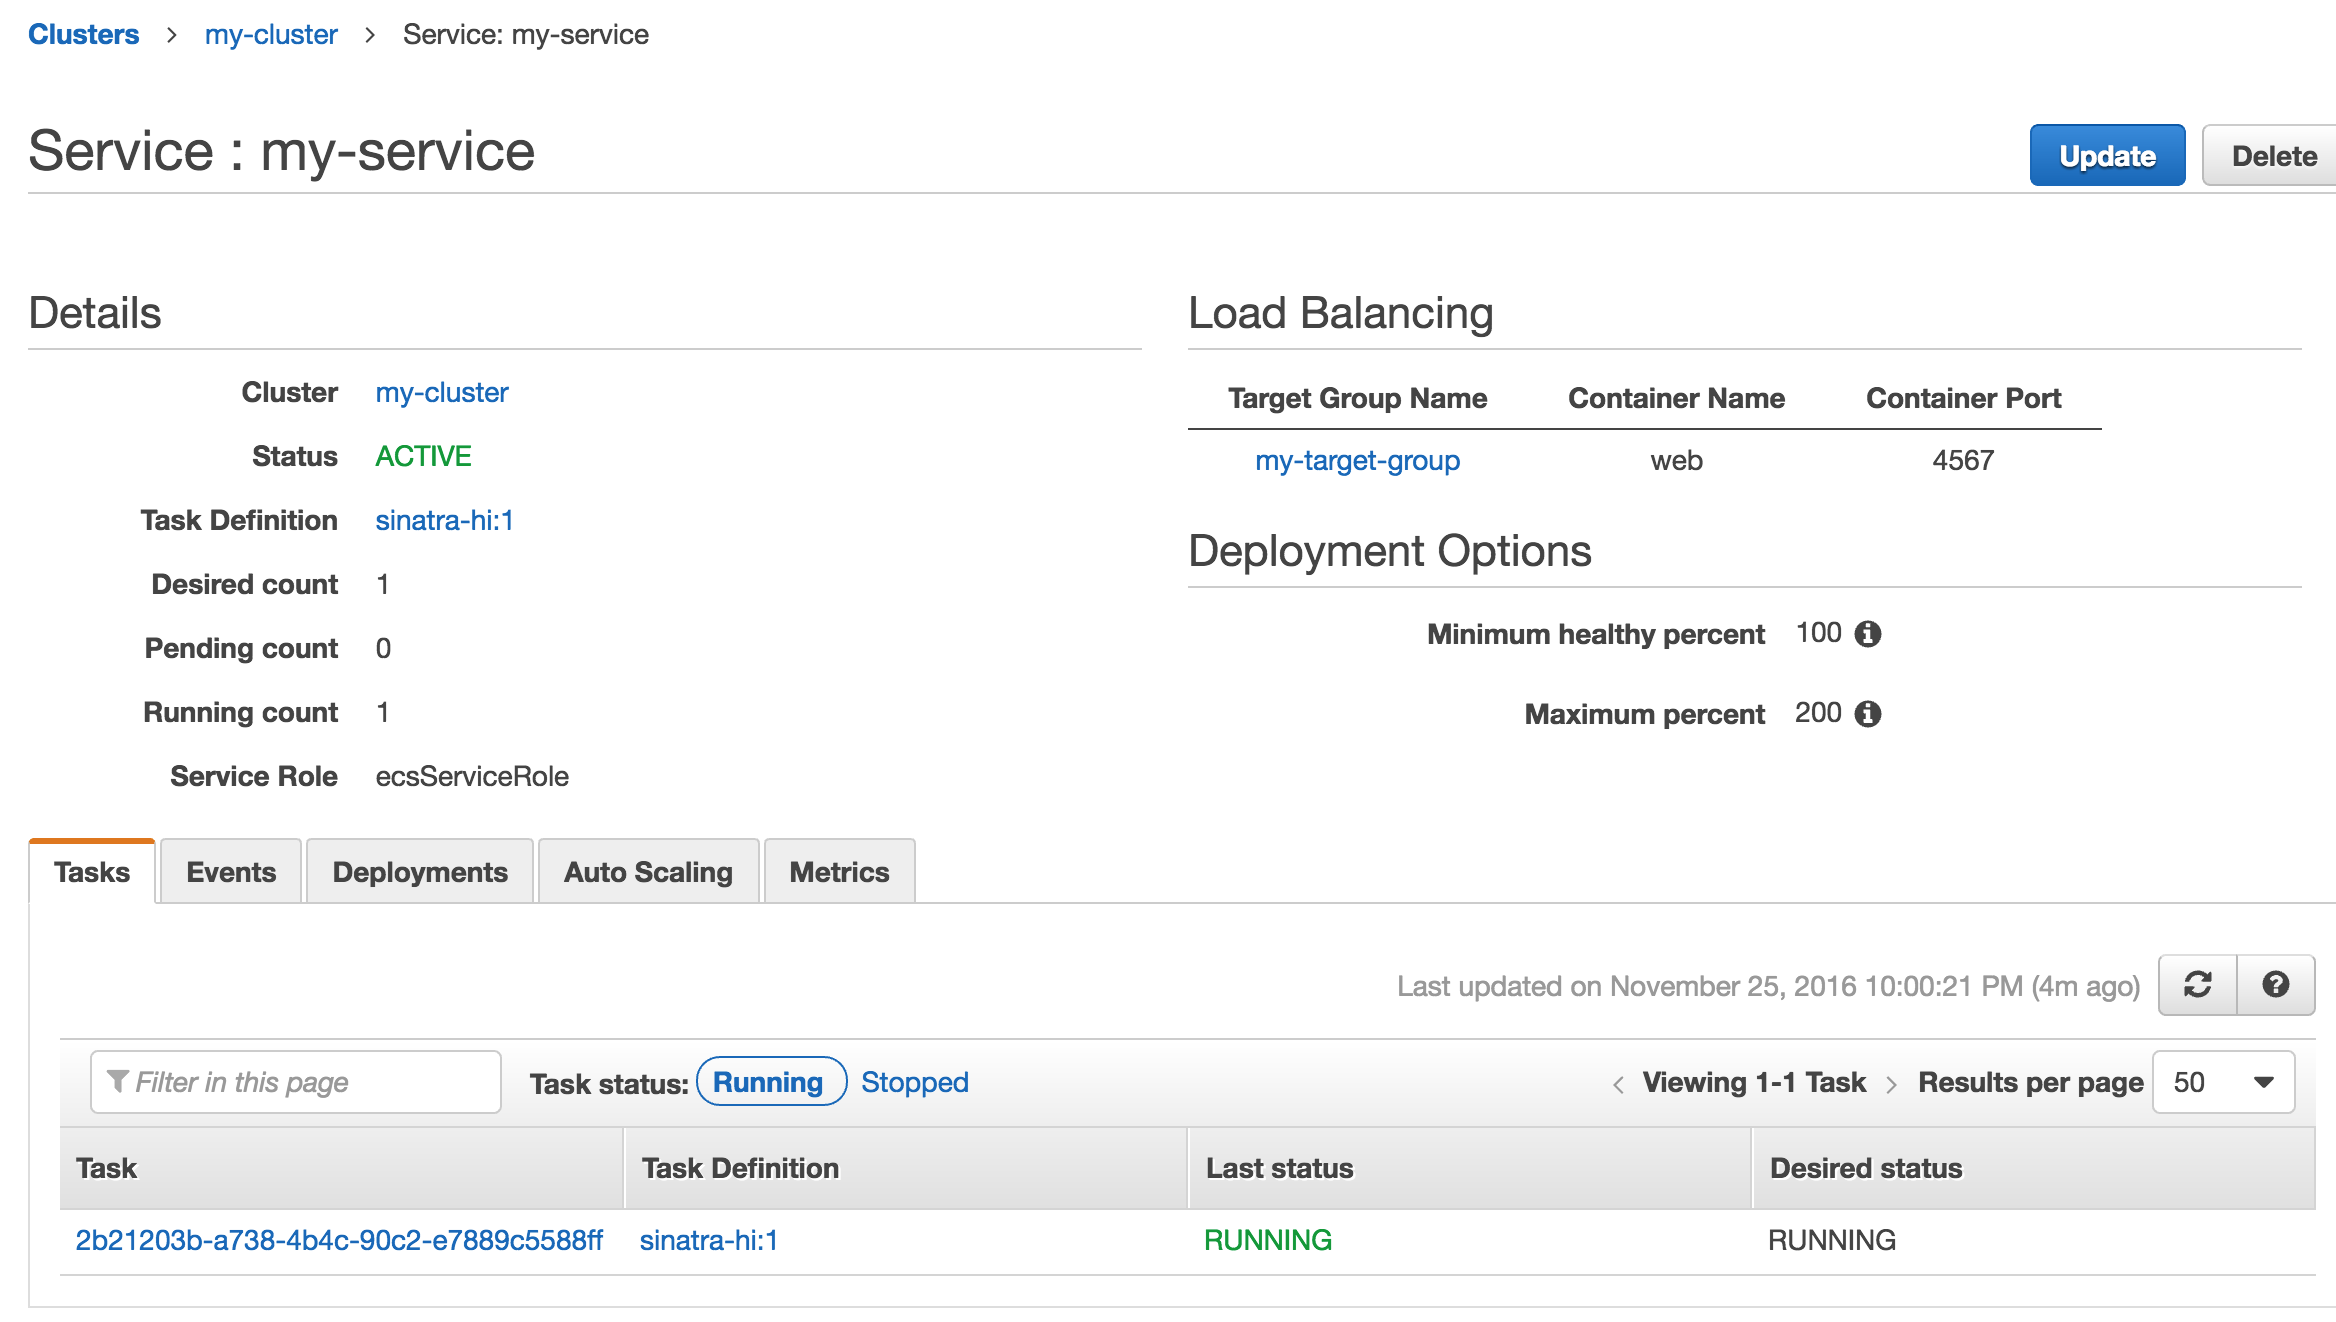
Now create the ECS service: my-service.
$ aws ecs create-service --cli-input-json file://ecs-service.json
You can confirm that the container is running on the ECS Console. Go to Clusters / my-cluster / my-service and view the Tasks tab.
5. Confirm Everything is Working
Confirm that the service is running correctly. You want to be thorough about confirming that all is working by checking a few things.
Check that my-target-group is showing and maintaining healthy targets. Under Load Balancing / Target Groups, click on my-target-group and check the Targets tab. You should see a Target that is reporting healthy.

If the target is not healthy, check these likely issues:
-
Check that the
my-ecs-sgsecurity group is allowing all traffic from themy-elb-sgsecurity group. This was done in Step 4 with the authorized-security-group-ingress command after you created the ELB. -
Check that the security groups for the ELB, in step 3, is set to the same security groups that you used when you created the ECS Cluster and Container Instance in step 1. Remember the ELB can only detect healthy instances in AZs that it is configured to use.
Let also ssh into the instance and see the running docker process is returning a good response. Under Clusters / ECS Instances, click on the Container Instance and grab the public DNS record so you can ssh into the instance.

$ ssh ec2-user@ec2-52-3-252-86.compute-1.amazonaws.com
$ docker ps
CONTAINER ID        IMAGE                            COMMAND             CREATED             STATUS              PORTS                               NAMES
9e9a55399589        tongueroo/sinatra:latest        "ruby hi.rb"        16 minutes ago      Up 16 minutes       8080/tcp, 0.0.0.0:32773->4567/tcp   ecs-sinatra-hi-1-web-d8efaad38dd7c3c63a00
4fea55231363        amazon/amazon-ecs-agent:latest   "/agent"            41 minutes ago      Up 41 minutes                                           ecs-agent
$ curl 0.0.0.0:32773 ; echo
42
$
Above, I’ve verified that the docker container is running on the instance by curling the app and seeing a successful response with the “42” text.
Lastly, let’s also verify by hitting the external DNS address of the ELB. You can find the DNS address in the EC2 Console under Load Balancing / Load Balancers and clicking on my-elb.
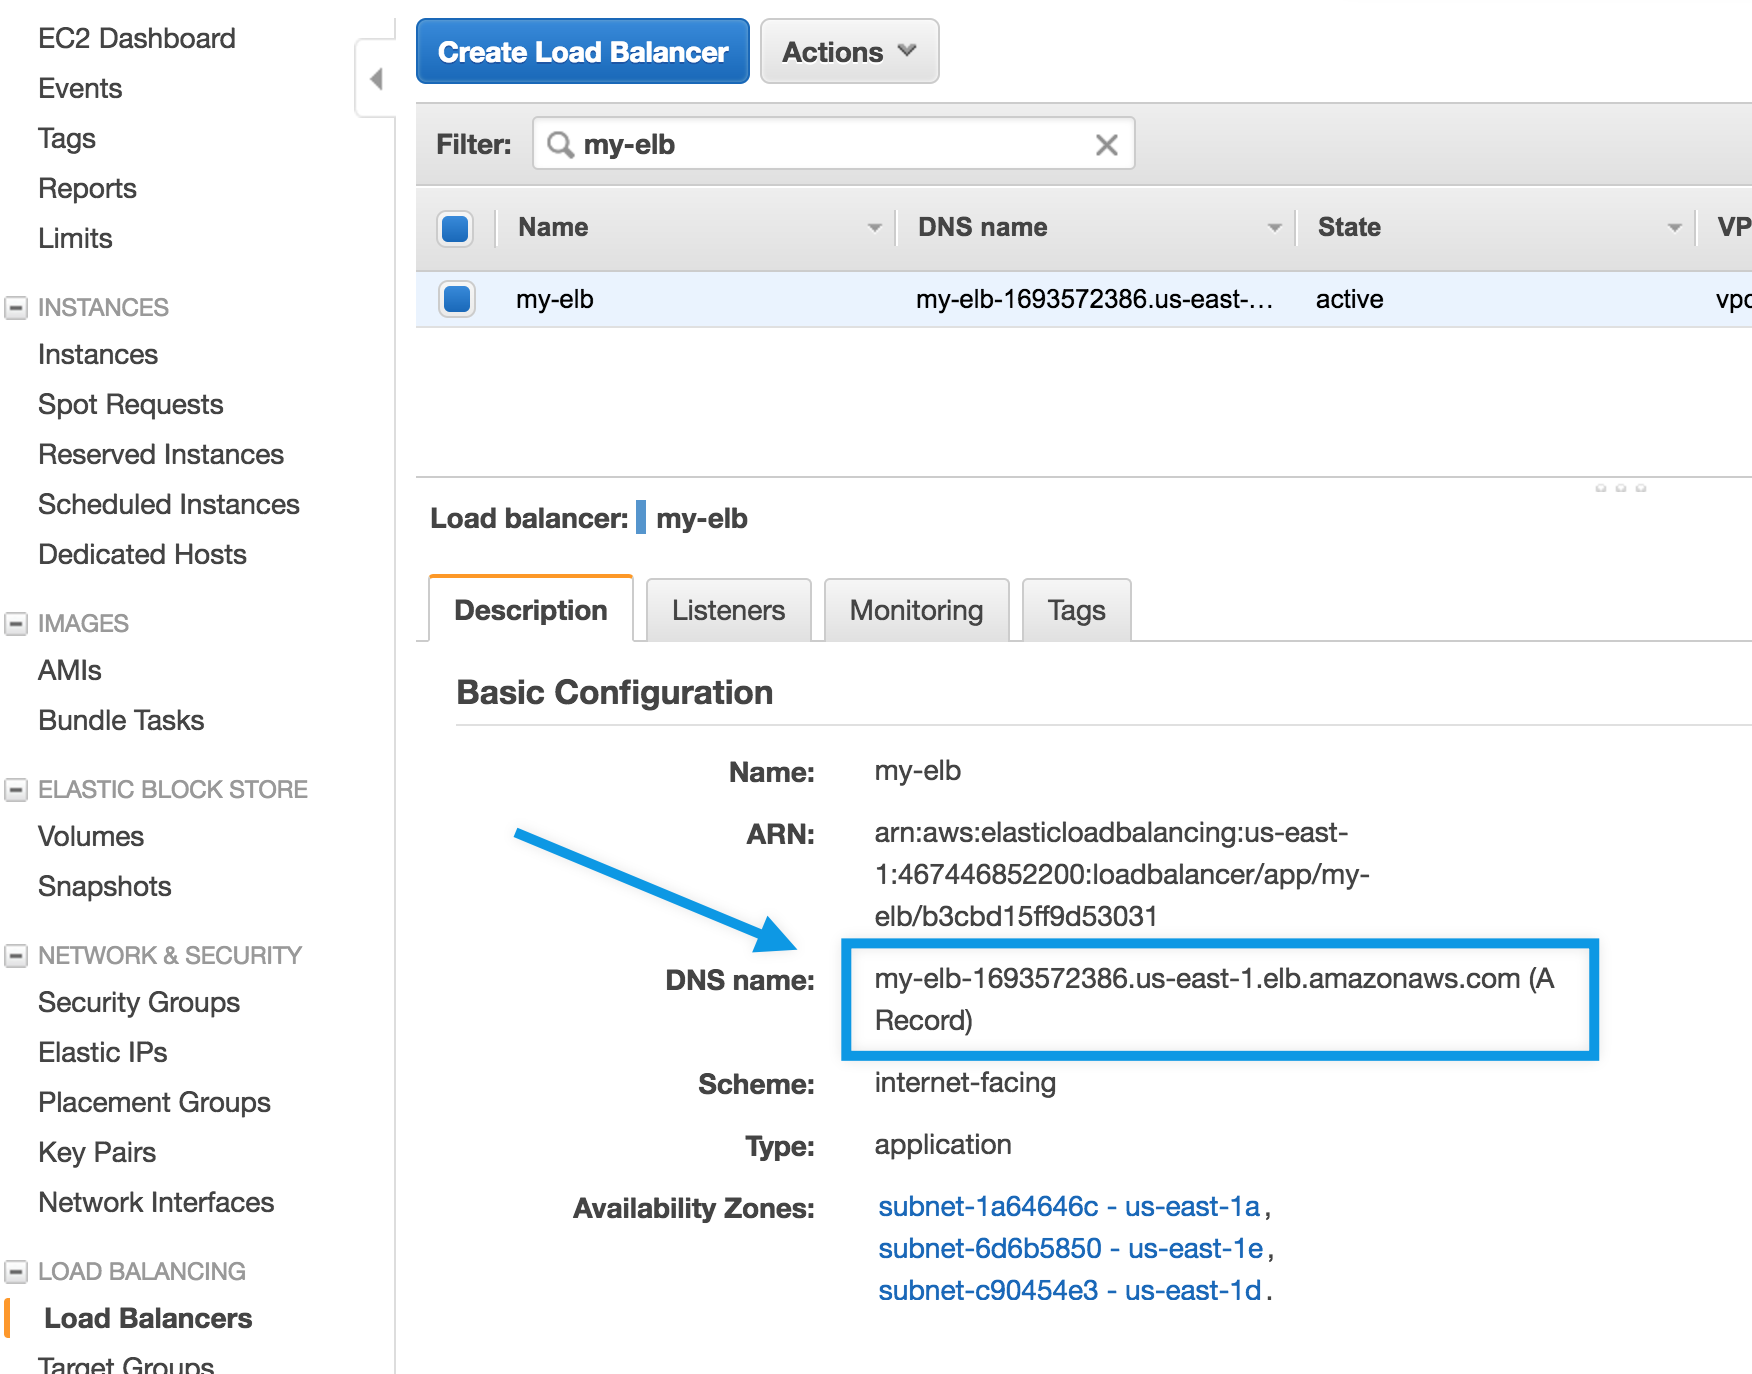
Verify the ELB publicly available DNS endpoint with curl:
$ curl my-elb-1693572386.us-east-1.elb.amazonaws.com ; echo
42
$
- Scale Up the Service to 4 Tasks
This is the easiest part. To scale up and add more containers go to Clusters / my-cluster / my-service and click on “Update Service”. You can change “Number of tasks” from 1 to 4 there. After only a few moments you should see 4 running tasks. That’s it!
- Clean It All Up
It is quickest to use the EC2 Console to delete the following resources:
- ELB:
my-elb,my-target-group - ECS Service:
my-serviceTask Definition:sinatra-hiCluster:my-cluster - Security group:
my-elb-sgandmy-ecs-sg.
Summary
In this post, I covered the ECS terminology and went through a simple example to create a Sinatra app behind an ELB.
Overall, I think that ECS is a pretty fantastic service. It handles the hassle of managing Docker orchestration and provisioning.